


You opened a Canva design, started dragging in elements, and then realised the whole thing needs to be landscape, not portrait. It happens to almost every creator. The short answer is that switching page orientation is quick once you know where the button lives — and there is now an even faster AI way to convert an actual photo from portrait to landscape without cropping anything out.In this guide, you will learn exactly how to change from portrait to landscape in Canva on both the free and Pro plans, along with tips to get the cleanest result every time.
Table of Contents
- How to Change Portrait to Landscape in Canva Pro
- How to Change Orientation on the Canva Free Plan
- Tips for a Clean Landscape Conversion
- Working With Multiple Page Orientations
- Why Change From Portrait to Landscape?
- Convert Vertical Video to Horizontal With insMind
- FAQs About Changing Portrait to Landscape
How to Change Portrait to Landscape in Canva Pro
If you have Canva Pro, the fastest route is the Resize feature. In newer versions of Canva, this tool is called "Magic Switch," which replaced the older resizing button. Either way, it takes about ten seconds. The specific steps may vary depending on the version. Please refer to the actual interface for the most accurate guidance.
- Open your design in the Canva editor. If you are starting from scratch, pick any template to begin.
- Look at the top-left toolbar and click the Resize or Magic Switch button. It has a small crown icon next to it, which marks it as a Pro feature.
- A side panel opens. You will see several options: pick a predefined size (such as A4 Landscape or 1920 × 1080), choose from category options, or enter custom dimensions manually. For landscape, make sure the width is greater than the height — for example, 29.7 cm for width and 21 cm for height.
- Click "Continue" or "Apply." You will have two choices: "Resize this design" to convert the current file in place, or "Copy & Resize" to keep your original portrait version and create a new landscape copy.
- Adjust your design elements. After resizing, review how your elements are positioned in the new orientation. You may need to resize or reposition text, images, and graphics to fit the wider layout.
That is it. Canva rebuilds the canvas at the new dimensions and attempts to reflow your text and elements to fit. Expect to do some manual repositioning afterwards, because complex layouts do not always translate perfectly between aspect ratios.
One important note: the Resize and Magic Switch features require Canva Pro. On the free plan they will appear greyed out. If you are on the free plan, move to the next section.
How to Change Orientation on the Canva Free Plan
Do not have Pro? You can still change from portrait to landscape in Canva for free. You just do it manually by starting a new, correctly sized design. The specific steps may vary depending on the version. Please refer to the actual interface for the most accurate guidance.
- From the Canva homepage, click "Create a design" in the top-right corner.
- Choose "Custom size" at the bottom of the dropdown menu.
- Enter your landscape dimensions (for example, width 29.7 cm, height 21 cm), set the correct unit, and click "Create new design."
- Open your old portrait design in another browser tab, select all elements with Ctrl/Cmd + A, copy them with Ctrl/Cmd + C, and paste them into the new landscape canvas with Ctrl/Cmd + V.
- Reposition and scale the elements to fit the wider frame.
This method works on every plan. But because Canva applies one orientation per file, you cannot mix a portrait page and a landscape page inside the same design. If your project needs both orientations, create separate files.
Tips for a Clean Landscape Conversion
Flipping orientation is easy, but getting the result to look good takes a little care. Here are practical tips to avoid the most common problems:
- Lock important elements first. Before resizing, lock any text boxes, logos, or graphics you do not want Canva to reflow automatically. This keeps them in place during the conversion.
- Use a wider background. If your portrait design has a solid or gradient background, extend it to fill the new wider canvas before repositioning elements. This avoids empty white space on the sides.
- Check text sizing after resize. Canva scales text proportionally, but font sizes can look too small or too large in the new dimensions. Proofread every text element after flipping.
- Reposition in groups. Instead of moving elements one by one, group related elements together (Ctrl/Cmd + G) and drag them as a unit. This preserves relative spacing and speeds up the process.
- Keep both versions. Use "Copy & Resize" (Pro) or keep the original file (Free) so you always have the portrait version as a backup. You never know when you will need both orientations.
- Know your requirements before starting. Consider where and how your design will be used before selecting a template. Picking the right orientation from the beginning saves you from having to convert later.
- Set up custom-size templates. If you frequently work with the same landscape dimensions, save a blank design at those dimensions as a reusable template. This lets you start new landscape projects in one click.
Working With Multiple Page Orientations
Sometimes a single project needs more than one orientation. A presentation might mix landscape slides with a portrait handout. A social campaign might need both a square post and a wide banner. Here is how to handle that.
For Canva Pro users
You can use the Resize feature on individual pages within a multi-page design. Select the specific page in the page navigator, use the Resize or Magic Switch tool, and apply the new orientation only to that page. Repeat the process for any other pages that need different dimensions. This lets you keep multiple orientations within the same project file.
For free Canva users
Because Canva applies one orientation per file, free users need a different approach. Create separate design files for each orientation, then download each one and combine them outside of Canva if needed. Alternatively, you can create separate pages within one design, each with its own arrangement of elements, while keeping the same canvas size — useful when the final output is a single format but the content varies page to page.
Why Change From Portrait to Landscape?
Switching orientation is not just about preference. The right format makes your work perform better in context.
Desktop and website banners
Websites, hero banners, and desktop wallpapers are all landscape. Converting a portrait product shot to landscape gives you a wide, professional banner that fits store layouts and boosts click-through.
Video thumbnails and slides
YouTube thumbnails, presentation slides, and video covers all use 16:9 landscape. A portrait photo will not fill the frame without ugly black bars on the sides.
Travel and scenic shots
Landscape orientation captures wider horizons and more context. Turning a tight portrait travel snap into a wide landscape reveals the full scene and makes it far more shareable on social media.
E-commerce listings
Marketplaces like Amazon and Shopify favor landscape main images. A consistent wide format keeps your product catalog looking clean and uniform across every listing.
If you have dozens of photos to reformat, consider using a batch resize tool to convert them all at once, which saves hours of manual editing.
Convert Vertical Video to Horizontal With insMind
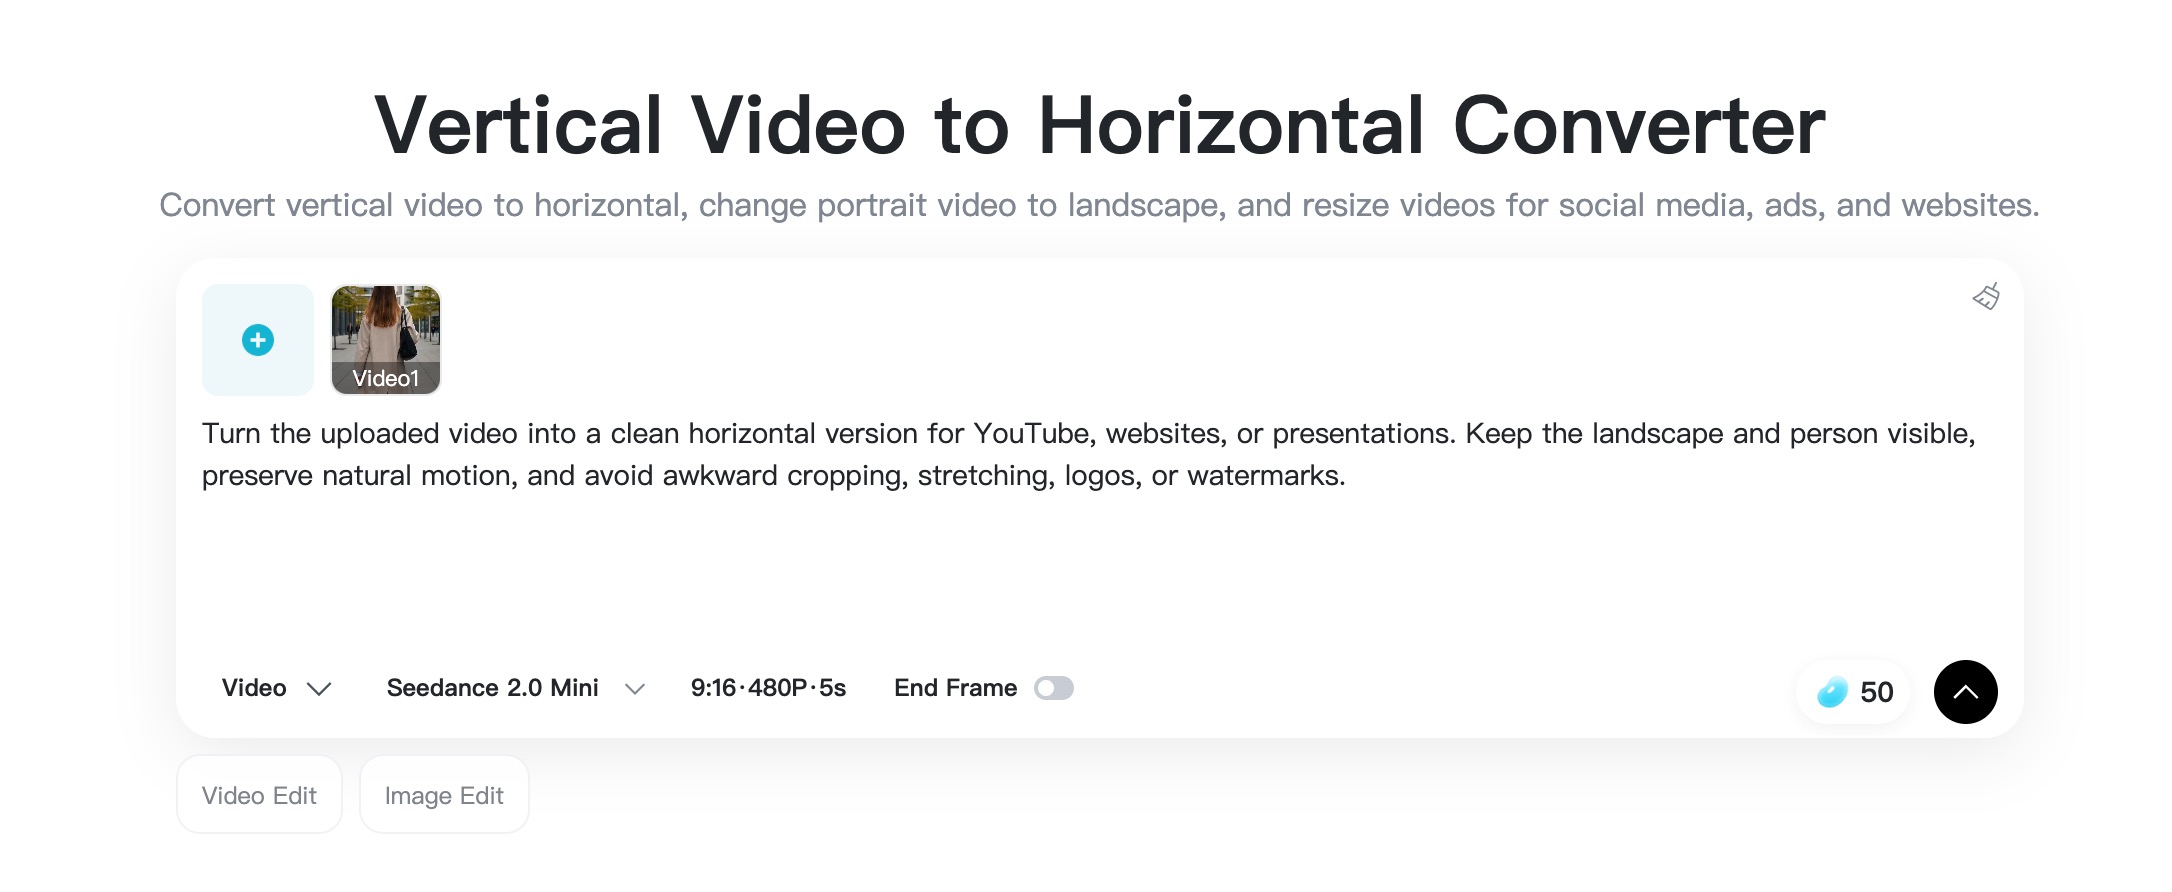
Canva is great for design files, but what about actual videos? If you recorded a vertical clip and now need a widescreen version for YouTube, a website banner, or a presentation, insMind's vertical-to-horizontal video converter does the job in seconds — no manual resizing or repositioning required.
Instead of cropping out important parts of your frame, insMind uses AI to intelligently expand the background and fill the new widescreen area. The result is a natural-looking landscape video that keeps your original subject front and center. You simply upload your vertical clip, let the AI process it, and download the finished horizontal video — all in a few clicks.
It is especially handy when you have a batch of vertical videos from your phone and need to adapt them for desktop-friendly platforms. Rather than rebuilding each clip manually in an editor, you can convert portrait videos to landscape online and skip the tedious repositioning work entirely.
FAQs About Changing Portrait to Landscape
How do I change from portrait to landscape in Canva?
Open your design, click the Resize button in the top-left toolbar (Canva Pro), enter landscape dimensions such as 29.7 × 21 cm for A4, then click Resize. On the free plan, create a new custom-sized design and copy your elements into it.
Can I change page orientation in Canva for free?
The Magic Resize and Magic Switch buttons are Pro features, but free users can still change orientation by creating a brand-new design with custom dimensions and manually pasting their elements into the new landscape canvas.
What is Magic Switch in Canva?
Magic Switch is the newer version of Canva's Resize tool. It lets Pro users change dimensions, swap orientation, and even translate text in one panel. You will find it in the top-left toolbar, where the old Resize button used to be.
Can I have both portrait and landscape pages in one Canva file?
No. Canva applies a single orientation to an entire design file. If you need mixed orientations, create separate design files for each.
Will resizing in Canva mess up my layout?
Sometimes. When you flip orientation, Canva tries to reflow elements, but text and graphics can shift. Expect to do some manual repositioning after resizing, especially with complex multi-element layouts.
What is the fastest way to convert a photo to landscape without cropping?
Use an AI image expander tool. It extends the background outward so nothing gets cut off. This is ideal for real photos where you want to keep the full subject intact while getting a wider landscape frame.
What size is landscape A4 in Canva?
Landscape A4 is 29.7 cm × 21 cm, or 11.69 × 8.27 inches. It is simply the reverse of standard portrait A4 dimensions.
Jayson Harrington
I am a professional writer and photo editing enthusiast. I share practical tips and tutorials to help creators design better photos and graphics for e-commerce, social media, and beyond.
Keep reading

How to Create a Robot Voice Effect Online in 2026
Learn how to create a robot voice effect online in 2026.

How to Do an Anime Voice: A Step-by-Step AI Guide
Learn how to do an anime voice with AI and create natural character audio in four steps.

How to Make an AI Rapper Voice: 4 Easy Steps with insMind
Learn how to make an AI rapper voice from original lyrics in four steps with insMind.

How Do I Make a Voicemail Greeting? A Simple AI Guide
Learn how to make a clear, personalized voicemail greeting with insMind.

How to Convert a Book into an Audiobook with AI
Learn how to convert a book into audiobook with insMind.

How to Make an Audiobook in 2026: A Useful Guide
Learn how to make an audiobook with AI using insMind.

How to Make an Announcer Voice with AI: A Practical Guide
Learn how to make an announcer voice with insMind.

How to Clone Your Voice with AI: A Practical Guide for Creators
Learn how to clone your voice with AI using insMind in four clear steps.

How to Make AI Voiceovers for YouTube Without Recording
Create YouTube AI voiceovers without recording your own voice.

How to Turn Text into Natural AI Voice Online
Turn written scripts into natural AI voice audio online with insMind.

How to Change From Portrait to Landscape in Canva
How to change from portrait to landscape in Canva with free and Pro methods.

Make Scroll-Stopping YouTube Shorts with AI: A Creator's Guide
Create YouTube Shorts from prompts or images with AI.

How to Create Facebook Videos with AI Online
Learn how to create Facebook videos with AI for posts, Reels, ads, and campaigns using smart prompts, video formats, captions, and editing tips.

How to Create Instagram Reels with AI: A Practical Workflow
Learn how to create Instagram Reels with AI using hooks, scripts, vertical video formats, captions, editing tips, and AI reel maker workflows.

YouTube Shorts Monetization: Requirements, Revenue, and AI Workflow
Learn YouTube Shorts monetization rules, ways to get paid, and how to create monetizable Shorts faster with insMind AI tools.

How to Turn Celebrity Photos into Videos with AI
Learn how to turn celebrity photos into AI videos with prompts, settings, and fast downloads.

How to Make YouTube Shorts with AI: The Complete Creator Guide
Learn how AI tools transform ideas into viral YouTube Shorts faster, easier, and without editing skills.

How to Create Marketing Videos from Photos in Minutes
Turn product images into engaging marketing videos using AI—fast, simple, and beginner-friendly.

Animate Your Logo in Minutes: AI Logo Animation Made Simple
Animate your logo online in minutes using insMind's AI logo animation generator — no design skills needed.

Create Talking Head Videos from Any Photo with AI (Beginner Guide)
Turn any photo into a realistic talking video using AI — no filming or editing required.

AI Influencer Video from Image: The Complete Beginner Guide
Create stunning AI influencer videos from a single image using insMind — no filming required.

How to Animate Old Photos with AI: Bring Old Portraits to Life
Animate old photos online and turn vintage portraits into realistic moving memories.

How to Create AI Celebrity Selfie Videos: Take a Video with Your Favorite Stars
Create fun AI selfie videos with celebrities using photos and realistic AI video effects.

How to Make ASMR Videos with AI: A Complete Beginner's Guide
Learn how to create relaxing AI ASMR videos for free using simple prompts and powerful models.

AI Fly Generator: Turn Any Photo Into Flying Videos Easily
Transform your photos into cinematic flying videos with AI Fly Generator.

AI Fight Generator: Create Realistic Fight Videos from Your Photos
Turn photos into dynamic fight scenes with AI Fight Generator, creating cinematic battles from images.

How to Animate a Pet Photo with AI (Dog & Cat Friendly)
Learn how to animate a pet photo and turn your dog or cat into a video with AI.

Animate Portrait Photo: How to Turn Portrait Photos into Videos
Learn how to easily turn a portrait photo into a moving video with AI. Use the photo-to-video generator to animate your images and share dynamic content.

How to Make a Birthday Video with AI in Minutes?
Generate memorable birthday videos in minutes. Use insMind’s AI birthday wishes video generator to delight friends and family.

How to Make Cartoon Video with AI
Generate high-quality cartoon videos from text or images. Use insMind’s AI cartoon generator for fun, engaging, and shareable animations.

How to Use Google Veo 3.1: Features, Guide, and Real Video Examples
Discover Google Veo 3.1 for text-to-video and image-to-video creation. Compare Veo 3.1 vs Veo 3 and Sora 2, and learn how to use it on insMind.

Kling O1 Video Model Overview: A Simple Guide to Creating and Editing Videos
Discover Kling O1 AI video model for creating, editing, and transforming videos with text or images.

How to Create Stunning AI Christmas Ad & Promo Videos with insMind
Transform your holiday marketing with AI-powered Christmas ad and promo videos. Create festive, eye-catching content with ease on insMind!

How to Create Lip-Sync AI Talking Videos with wan 2.5 on insMind
Unlock the power of WAN 2.5 to create stunning lip-sync AI talking videos on insMind. Bring your characters to life in minutes!

How to Remove Fence from Photo Precisely
Tired of fence lines? Dive into the guide and reveal methods to remove fences from photos without messing up the background through a dedicated platform.

How to Turn a Drawing into a Realistic Image with AI Online
If you want to turn your drawing into a realistic AI creation without technicalities. This ultimate guide outlines the best platform for this task, with guided tutorials.

How to Get the Wednesday Addams Makeup Look
Recreate the Wednesday Addams goth look in seconds using insMind’s AI Image Generator.

What Would I Look Like Skinny? Try the Free AI Skinny Filter
See how an AI skinny filter can instantly show a slimmer version of yourself and learn how to try it with insMind.

AI Group Photo Generator: Create Perfect Group Portraits Instantly
Do you want to create the perfect group image? Read this article to find out the best AI group photo generator to create the perfect group images.

Create Your Own Stranger Things Aesthetic with AI
Discover the Stranger Things aesthetic and easily create cinematic visuals with AI.

Nano Banana Pro | Everything You Need to Know
Meta Description: How does Nano Banana Pro elevate consistency in faces and characters? Explore the guide and get a detailed overview of this emerging visual AI technology.

From Product Photos to Ad Videos: How Brands Use AI to Boost Engagement
Discover how brands use AI to transform product photos into engaging ad videos and increase audience interaction with insMind.

How to Enhance Video Quality with AI: A Simple Step-by-Step Guide
Discover a step-by-step guide to improve video quality using AI. Boost your content with advanced techniques from insMind!

How to Create Cinematic Storyboards with AI: A Complete Guide
Are you looking to learn how to create cinematic storyboards with AI? Here is a detailed guide with step by step instructions to help you.

AI Explainer Video Generator: How to Turn Text and Images into Explainer Videos
Are you looking to learn how to create AI explainer videos? Here is a detailed guide with step by step instructions to use AI explainer video generator.

Goatee Beard Filter Online: Try the Perfect Goatee Look Instantly
AI filters online help you transform your entire look without needing to grow any hair. The following article explores adding a goatee filter to your images.

Afro Hairstyles for Women: How AI Tools Can Transform Your Look
Want to experiment with Afro ladies' hairstyles? Learn how the best online platform can help you celebrate natural beauty and culture.

How to Remove Frame from Photo Online with AI?
Learn how to remove photo frames online using a powerful AI tool. Restore original look, enhance clarity, and create clean, seamless images easily and quickly.

2 Ways to Fix an Underexposed Photo: Bring Hidden Details Back to Life
Learn how to fix an underexposed photo with easy AI and manual methods. Restore hidden details, improve brightness, and make every image clear and vivid.

How to Make AI Cute Animals Dancing Videos with insMind
insMind's AI tool turns pet photos into cute, shareable dancing videos instantly.

How to Create John Pork & Tim Cheese TikTok Meme Videos with AI
Create John Pork & Tim Cheese TikTok memes easily using AI meme generator & photo-to-video tools.

How to Restore Your Family Photos with AI in Minutes
AI-powered tool quickly restores, colorizes, and repairs old family photos online.

How to Make Pixelated Images Clear Again Without Photoshop
How to unpixelate an image? Read the following article and learn how to remove blocky or pixelated appearance from photos directly from your browser.

How to Make a Coloring Book: Enhance Your Kids Creative Mind
If you want to learn how to make coloring books, read this article. It provides the best AI tool, which offers various styles and creates flawless results.

Image to Video Converter Guide: Transform Your Photos into MP4 Videos
Transform photos into MP4 videos with insMind AI—add motion, effects, and music for social media or memories.

How to Make a Good Dating Profile Picture: Guides, Tips & Templates
You can attract others by creating the best dating profile picture.This article will provide all the necessary tools, steps, and tips to achieve that.

How to Use AI Magic Eraser to Erase Anything You Don't Like in a Photo
AI Magic Eraser by insMind simplifies photo editing by removing unwanted objects, people, or text with just a few clicks—no skills required.

How to Magnify Part of an Image? Focus on What Matters
Want to highlight key details in your photos? This guide explains how to use image magnifier to zoom in specific parts of an image without losing quality.

How to Fix Yellow Teeth - Best Ways in 2025
If you are tired of seeing your teeth yellow, read this article. It provides a seamless method for learning how to fix yellow teeth.

How to Remove Green Screen from Photos: No Photoshop Needed
Remove green screen from photos effortlessly with AI—no Photoshop needed. Try insMind's online tool for professional results.

What is Labubu? One Article to Learn Everything about Pop Mart Labubu
This article talks about the various types and reasons behind the Labubu dolls. Learn what you have been missing about these cute abominations.

How to Turn Photo or Text into Viral Memes in Seconds
Create hilarious viral memes instantly from photos or text – no design skills needed with AI!

Wondering How to Change the Color of Clothes in Photoshop? Find Here!
If you're wondering how to change the color of clothes in Photoshop, go through this guide. You will find the detailed guide on cloth color change here.

How to Make Hybrid Animals with AI: Combine Animals Online
Create unique animal hybrids with AI—mix, style, and share your wildest creature combos instantly!

What Will My Son Look Like? Find Out Now!
If you're wondering about "How will my son look like?" try the insMind baby generator. This article will help you figure out your son's facial look with AI.

Bring Old Photos to Life: Learn How to Colorize Black and White Photos
If you want to restore your old black-and-white pictures, read this article. It provides steps on how to colorize black-and-white photos with top AI tools.

What is Noise? How to Remove Grain from a Photo With 5 Tools?
Looking to remove noise from your grainy photos, you've come to the right place. You will find a complete guide to 5 tools with detailed steps to reduce noise.

Best Methods on How to Change the Color of Shirts in Photoshop
If you don't understand why and how to change the color of a shirt in Photoshop, read this article. It provides different steps and reasons in detail.

Try On Glasses Online with AI: Which Glasses Suit My Face
Upload a photo to see which glasses fit your face best using AI.

How to Try On Braces Online: See What You Look Like with Braces
Try virtual braces with AI! See your smile transformation instantly for free.

How to Make an AI Baby Podcast Video Online for Free
Instantly turn your photo into a realistic and adorable baby podcast video online for free.

How to Turn Photo into Mermaid Videos with Top 5 AI Mermaid Filters
Discover 5 tools that apply a mermaid filter to any photo and transform it into a magical underwater video with stunning effects in just a few clicks.

Create Your Own Superhero with AI: Build a Custom Hero in Seconds
Unleash your creativity with insMind’s AI Superhero Generator. Upload your photo and watch as AI transforms you into a unique superhero with custom outfits and powers—perfect for social posts, avatars, or just for fun.

Picture Stencil Maker: How can you convert photos to stencils online for free?
Convert photos to stencils online for free—no skills needed. Fast, easy, and high-quality results!

Long Hair Filter: See Yourself with a Long Hairstyle Instantly
Curious about how you'd look with long hair? Use insMind's virtual tool to instantly preview stunning long hairstyles in seconds—free and fun!

How to Create Custom Graffiti Art Online with AI
Learn how to create unique graffiti art using AI. Discover tips and tools to make your custom street-style artwork in seconds—no spray can needed!

Make Yourself Cry with AI: How to Create a Realistic Sad Face in Photos
Discover how to create a realistic sad face in your photos with AI. Learn step-by-step to make your pictures tearful and dramatic—fun and free with insMind.

6 Pro Tips to Make a Clean Transparent Signature Online
Learn 6 expert tips to create a clean, transparent signature online. Perfect for digital documents, logos, and watermarking—quick and easy with insMind.

Beginner's Guide: How to Remove a Drawn Line from an Image
A beginner-friendly guide to removing drawn lines from any image. Clean up photos in seconds using smart AI tools—no editing skills needed.

Bixie Haircut Guide: 5 Styling Tips and How-To Tutorial
Explore trendy Bixie haircut styles for fine or thin hair. From short Bixie cut to long bixie haircut, find your perfect flattering look today.

Step-by-Step: How to Make Before and After Pictures Like a Pro
Create stunning before & after photos like a pro! Learn step-by-step editing and framing tips for perfect transformations.

How to Join Two Photos Together Step-by-Step
Joining two photos together with AI may seem tricky, but it's easier than other methods. If you want to do it smartly, this guide is for you!

WhatsApp DP Converter: Make Profile Pics That Fit the Right Size
Learn how to resize any image to fit WhatsApp DP dimensions quickly and easily. Get the right size every time with our useful tips & tools!

Teenage Filter | Reveal Your Younger Look and Brighten Photos
Turn dull portraits into youthful ones with the Teenage Filter. Experience smoother skin, vivid features, and cheerful vibes by revisiting teenage looks.

How to Add a Smile to a Photo? Make Every Picture Lively
Learn how to add a smile to a photo with tools like insMind that create natural, beautiful smiles to brighten portraits and group pictures effortlessly.

Virtual Short Hair Makeover: Find Your Perfect Look in Seconds
Explore short hairstyles with insMind’s virtual try-on tool. Upload a photo and find your perfect look.

How to Animate a Photo with 10 Best Apps
Discover how to animate a photo with top apps designed to create smooth and professional-looking animations from your favorite pictures.

How to Get Smooth Skin - Top Tips in 2025
Want smooth skin in real life and on your phone? This guide shows you how—with the right routine, consistency, and simple steps.

How to do Product Photography: Step-by-Step Guide
Discover what product photography is, why it's important, and how to start. The guide explains photo types, gear, editing tips, and common mistakes to avoid.

How to Give Yourself a Buzz Cut Fade – DIY Buzz Cut Tips
We are all tired of the same old hairstyle. Here’s how to give yourself a buzz cut with insMind AI before you get an actual haircut. Save time and money.

How to Make an Avatar That Reflects Your Personality Online
Discover how to make an avatar that fits your style and purpose across platforms. This guide explores types and ideas to personalize digital identity.

Discover How to Blur the Background of a Picture Like a Pro
Learn how to blur the background of a picture using techniques. Improve photos, enhance focus, and create professional-looking images with clarity.

How to Create an App icon
In the ever-growing world of applications, you might want to learn to create an app icon. Here’s how to create an App Icon using AI icon generator.

How to Try a New Hair Color Without Dyeing It
Discover how to preview hair colors virtually before committing. Try on new shades risk-free with AI.

Easy Steps to Make Ghibli-Inspired AI Videos: Transform Your Imagination
Turn your ideas into magical Ghibli-style AI videos with ease. Upload, describe, and generate stunning results in seconds.

How to Create an Icon for a Website: A Guide for Beginners
Learn how to create an icon for websites by using the insMind AI Icon Generator for stylish results. An easy process that helps in creative and simple editing.

Effortlessly create your AI Art with insMind Ghibli-style Filter
Turn your photos into Ghibli-style AI art effortlessly. No design skills needed—just upload and transform!

Turn Your Dog into a Cartoon: Custom Dog Cartoon Portraits from Photos
Easily create a custom cartoon portrait of your dog from a photo. Fun, fast, and shareable with AI-powered tools!

How to Turn Your Pets into Cartoon Character for Free
Easily cartoonize your pet's photo for free using AI. No design skills needed—fun, fast, and shareable!

How to Turn Photos into Ghibli-Style Images with AI for Free
Turn your photos into stunning Studio Ghibli-inspired art online for free. Our Ghibli filter is perfect for landscapes, portraits, and illustrations.

How to Add Suit to Photo Online Free in Seconds
Learn how to add a suit to a photo online for free with the most powerful AI tool and instantly upgrade your look by adding the desired formal attire.

How to Remove People from Travel Photos for Perfect Shots
Quickly remove people from photos using insMind's AI tool. Perfect your travel shots in seconds.

How insMind Glare Removal Transforms Your Photos with AI
Easily remove glare from photo using insMind's AI tool. Restore image clarity in seconds with one click.

AI VTuber Model Creator: Create Your Own AI VTuber Model
Design your own VTuber with the best VTuber model maker. Fast, free, and AI-powered—start now with insMind!

How to Remove Signature Background: Top 5 Tools in 2025
Discover the best tools to remove background from signature with ease. Try a signature background remover for clean, professional digital signatures in 2025!

Create Elegant Collages with insMind's AI Collage Generator
Learn how to combine photos with insMind's AI collage generator and create artistic image frames with customizable templates and other editing features.

How to Elevate Your Brand with a Logo Background Remover
Learn how to remove background from logo using a free logo background remover to create a clean, professional brand identity in seconds!

How to Enhance Midjourney Images with a Free Upscaler
Learn how to enhance your Midjourney resolution with a free Midjourney upscale tool. Get high-quality, sharp images online in just a few clicks!

How to Clone Yourself with AI - Image Cloning
Discover how AI clone image technology helps you create realistic digital clones for LinkedIn, resumes, and more in just a few clicks

AI Background Generator: How to Replace and Customize Photo Backgrounds
Learn how to replace and customize photo backgrounds using an AI background generator. Try insMind's tool for fast, impressive results!

Photo to Outline: How to Create Stunning Line Art from Any Image
Transform your photo to outline and create stunning line art with ease using insMind's powerful tool. Try it now for impressive results!

The Easiest Way to Delete Emojis from Pictures Without Losing Quality
Learn how to remove emoji from photo without losing quality. Try insMind's powerful emoji remover for fast and precise results.

How to Get Rid of Watermarks on Photos Easily with AI
Learn how to remove watermark from photo effortlessly using AI. Try the AI watermark remover by insMind today for fast and easy results.

How to Remove and Replace Text in Image Without Photoshop
Learn how to easily edit text in images without Photoshop using a free photo text editor. Try it today on insMind!

Learn How to Make an AI Headshot: A Step-by-Step Guide
Wondering how to make an AI headshot? Generate a high-quality headshot for your social media, LinkedIn, or resume profiles.

How to Add Speech Bubbles to Photos: A Step-by-Step Guide
Learn how to add speech bubbles to photos with our step-by-step guide.

How to Take a Professional Headshot with iPhone for Free
Learn how to take a professional headshot with an iPhone. Follow expert tips and step-by-step guidance to capture polished headshots for any platform.

How to Upscale Your Anime Images to 4K with AI: A Complete Guide
Discover how to enhance and upscale your anime images to stunning 4K quality using AI-powered tools for sharper, more detailed visuals.

Photo to Pencil Drawing: Step-by-Step Guide to Converting Your Photos into Art
Transform your photos into stunning pencil sketches with simple steps. Learn how to create artistic drawings effortlessly using digital tools.

How to Restore Old Photos Online with AI: A Step-by-Step Guide
Bring old photos back to life with AI-powered restoration. Follow this easy guide to enhance faded images, fix damage, and preserve precious memories.

How to Retouch Your Portraits with AI: A Guide to Enhancing Faces Online
Discover how to effortlessly enhance portraits with AI. Improve facial details, smooth skin, and achieve a polished look with smart online tools.

How to Create Stunning Instagram Profile Picture
Learn how to craft a eye-catching Instagram profile picture.Elevate your online presence effortlessly with insMind's easy tools.

How to Make a Facebook Frame & Perfect Your Profile Picture
Make your Facebook profile picture stand out with custom frames. Use insMind's tools to personalize your image in minutes!

How to Fix Blurry Pictures: A Comprehensive Guide
Learn easy ways to fix blurry photos and enhance clarity with powerful editing tools. Restore sharpness and make your images look crisp and clear.

How to Make a Twitch Profile Picture - The Best Twitch Avatar Maker
How can I create a unique Twitch avatar? Unveil the article below to discover the best Twitch avatar maker and a list of popular avatar styles for guidance.

How to Remove Background from Hair in 2 Ways
Have trouble removing backgrounds from images with hair? Try this accurate hair background remover and turn your photo transparent automatically.

How to Remove Background from Sticker in 2 Ways
Want to remove background from stickers? Discover how to use a free online sticker background remover and Photoshop to create transparent stickers.

How to Turn Pictures into Comic Book Style
Transform your photos into stunning comic book-style art with ease! Perfect for personal projects, social media, or creative designs.

How to Convert Photo to Disney Character Online
Easily transform your photos into enchanting Disney-style characters with AI-powered tools!

How to Outline People in a Photo for Free: A Complete Guide
Learn how to outline people in photos for free using simple tools and techniques! Perfect for creating striking visual effects, editing portraits, or making your designs stand out.

How to Remove Tan Lines from Photos?
Learn how to remove tan lines from photos quickly and easily with the best tools. Achieve flawless images for social media or special occasions.

How to Remove Logos from Clothing on Photos?
Struggling to remove logos from clothing? This article reveals the best tools and technique, find out how to remove logos from clothing on photos.

How to Write the Best Prompts for AI-Generated Art: Perfecting Your Prompts
Want to know how to generate art with prompts? Get the answer with challenges and helpful tips to learn how to write the best prompts for AI-generated art.

A Practical Guide to How to Remove Logos from Photos
Want to know how to remove logos from photos using an advanced AI tool? Explore this innovative logo remover solution for clean and professional images.

The Easiest Way to Remove Dates and Locations from Photos in 2025
Discover the easiest way to remove dates and locations from your photos in 2025. This guide offers simple steps and tools to clean up your images for a more polished look.

Transform Your Photos into Stunning Pixel Art: A Complete Guide
Learn step-by-step how to convert any image into a unique pixelated masterpiece, perfect for digital art projects or creative expressions.

Sharpen Text Images: How to Make Text More Legible
Learn how to sharpen text images for better legibility. This guide covers effective techniques to enhance text clarity, making it easier to read.

How to Use AI Image Generator
What to extract an image from your dreams? Read the article below and unfold tools that help you learn how to use AI image generator.

Detailed Instructions on How to Remove Background in Illustrator
Learn how to remove background in Illustrator with this guide. Perfect for beginners and pros alike, master the art of background removal today.

How to Resize Your Profile Picture for a Perfect Look
Make your profile picture stand out! Learn how to resize your photo for a flawless look on any platform.

How to Create Stunning Product Displays Using AI Background Tools
Transform your product displays into stunning visual masterpieces with AI background tools!

Make your brand stand out with Curved Text Logo Maker
Want your brand to stand out? Create eye-catching logos with our Curved Text Logo Maker! Giving your logo a professional and memorable look in minutes.

How to Take Professional-Quality Food Photos with Just a Smartphone
Want to capture food photos that look like they were taken with a professional camera? With just a smartphone and a few easy tips,bringing out the colors, textures, and flavors of every dish!

How to Change Background Color on Instagram Story
Do you want to learn how to change the background color on Instagram Story? Uncover the article to upgrade your creativity skills by exploring this technique.

3 Quick & Effective Ways on How to Make a Photo Collage
Discover how to make a photo collage effortlessly! Follow our easy guidelines to create beautiful designs without delving into complexities.

How to Insert Watermark to photo in Canva
Do you want to explore how to insert a watermark in Canva? Uncover this in-depth article and explore the Canva watermark and its best free alternative.

How to Make a Photo Collage on Mac with 5 Ways
Do you want to create the best photo collage for your friends? This article will explore the top 5 tools on how to make a photo collage on Mac with steps.

How to Make a Photo Collage on iPhone with Easy Steps
Explore how to make a photo collage on an iPhone for free with these easy steps. Discover the best app and simple steps to showcase your favorite memories.

3 Ways to Increase Photo Resolution: 2025 Guide
Need higher resolution photos? Discover 3 powerful ways to increase photo resolution in 2025!

How to Sharpen an Image in Photoshop and Easier Way for Beginners
Want to make your photos sharper and more detailed? Learn how to sharpen images like a pro using Photoshop, plus discover an easier, beginner-friendly method.

AI Erase & Replace: How to Add or Replace Objects in Photos
Want to effortlessly transform your photos? With the AI Erase & Replace tool, you can instantly remove unwanted objects and add new elements in just a few clicks!

How to Remove Background from Hair in Photoshop and Easier Way
Struggling to remove the background from hair without losing fine details? Discover an AI-powered shortcut that does it in seconds.

How to Make a Watermark for Your Photos?
Want to protect your creative work and boost your brand identity? Learn how to make a professional watermark for your photos in minutes!

Add Christmas Background to Photo for Festive Delight: 2 Quick Ways
How can I enhance my holiday photos with backgrounds? Explore the article and learn how to add a Christmas background to photos through reliable tools.

2 Quick and Efficient Ways | How to Make a Christmas Card
Learn how to make a Christmas card with creative ideas, step-by-step instructions, and festive designs to spread holiday cheer to loved ones.

How to Reduce Photo File Size on iPhone: 2025 Guide
Discover how to easily reduce photo file size on your iPhone without sacrificing quality in this 2025 guide.

Step-by-Step: Turn Photos into Personalized Stickers on iPhone
Discover how to create custom stickers from your photos on your iPhone with this easy guide! Make your digital communication more expressive and fun.

How to Make Passport Size Photos at Home: A Step-by-Step Guide
Need passport-size photos but don't want to go to a professional studio? Learn how to make passport-size photos at home with this simple, step-by-step guide!

How to Replace a Face in a Photo Without Losing Quality - 2 Ways
Do you want to add a fun touch to your social media videos? Learn how to replace a face in a photo to create personalized content effectively.

How to Make PNG with a Transparent Background
Do you want to make a PNG Image without background? Explore the following article and understand how to make a PNG with transparent background.

How to remove background in Photoshop and easier way
Find out how to remove background from image using Photoshop or the free, easy-to-use insMind background remover. This guide covers all the steps to create professional visuals.

Easiest Ways to Enlarge Photos on Canvas without Quality Loss
Discover the easiest ways to enlarge photos for canvas prints without sacrificing quality.Perfect for professionals and DIY enthusiasts alike!

Your One-stop Solution to Restore Old Photos Online
Looking to save and restore old photos online? Try the easiest and most effective solution to enhance, colorize, and preserve your precious memories with stunning results.

How to Enlarge Instagram Profile Pictures and Save in HD
Ever wanted to view and save Instagram profile pictures in full HD? Discover the easiest ways to enlarge Instagram profile pictures without losing quality.

Remove Glare from Photos with Professional Results Using insMind
Easily achieve a glare-free, professional look for your photos with insMind. Enhance every detail and keep your images looking sharp, clear, and natural by removing unwanted reflections.

Transparent Background: Game Changer for Graphic Design and Photo Editing
Discover the insMind Transparent Background Tool: an essential solution for designers and photo editors to instantly remove backgrounds and enhance visuals.

The Best AI Anime Enhancer to Improve Anime Quality
Discover the best anime enhancer to enhance anime quality, optimize visuals, and elevate your anime-watching experience to boost clarity and detail.

How to Make a Magazine Cover? | Introducing 2 Best Ways
Want to create a magazine cover? Learn the easiest ways to design magazine covers with ready-to-use templates and AI tools.

How to Change the Color of a PNG with 5 Ways
Learn how to change the color of a PNG using 5 different methods. Dive into the multiple tools that will help you modify colors in a PNG file efficiently.

How to Merge Two Photos Together with 4 Simple Ways
Want to explore image-merging techniques for your social media? Dive into the article below and get your hands on the best tools to merge two photos.

How to Convert Your Photos to Van Gogh Paintings with AI
Do you desire to explore the art of converting a photo to Van Gogh? Read this article and learn how to apply the Van Gogh filter to your photos.

Glare Removal: How to Remove Glare From Photos for Free
Discover how to make your photos shine without distractions and achieve that perfect shot.Our guide provides you with easy-to-follow techniques and tools.

Photo to Cartoon: Cartoonize Photos for Free Online
This user-friendly tool lets you easily create fun, cartoon-style images in just a few clicks. Perfect for profile pictures or unique gifts, give it a try and bring your memories to life!

How to Cartoonize a Photo for Free Online in 2025
Discover easy-to-use options that instantly turn any image into a playful cartoon, perfect for social media, gifts, or just exploring a new creative style.

Rotate Image: Instantly Rotate an Image with One Click for Free
Give your images a fresh angle with our Free Online Image Rotator! Instantly rotate any image with just one click.

Free Online Flip Images: Easy Tool to Flip an Image
Need to flip an image with zero hassle? Try our Free Online Image Flip Tool!

How to Make a Happy New Year Card 2025: Templates & Greetings
Do you want to wish your friends and family a personalized New Year card 2025? Read the article and explore ways to make a Happy New Year card.

How to Edit Multiple Photos at Once: Streamline Your Workflow
Looking for a way to edit multiple photos at once? Read this article to explore insMind, an advanced AI tool for bulk photo editing.

Three Ways to Fill Your Images with AI Generative Fill
Are you looking to add a new life to your boring pictures? Read this article to utilize the AI fill-in image feature to improve the overall outlook.

Mirror Image:The Best Online Tool to Mirror an Image for Free
A practical and convenient picture mirroring tool that can provide great help and convenience to both professional users and ordinary enthusiasts.

Emoji Maker: Easily Add Emoji to Photo Online for Free
If you want to add a sense of story to your photos?use free online insMind to add emoji to your photos.

Enhance Your Photos with Fun Emojis using insMind for Free
Join the creative army of insMind, use emoji to light up your life, and make every photo a messenger of happiness and personality.

Effortless PNG to JPG Conversion: Simplify Your Image Process
Embrace the ease of image manipulation with insMind's revolutionary PNG to JPG converter.

SVG to JPG Conversion Made Easy with insMind: Quick Guide
The Effortless Journey from SVG to JPG with insMind's Comprehensive Image Format Transformation Guide

Boost Your Workflow with insMind’s Instant TIFF to JPG Converter
Saving you valuable time and effort by instantly transforming TIFF images into highly compatible JPG format.

One-Click Perfection for Your Instagram Profile Picture
Revolutionize your Instagram profile with Circle Crop, craft effortless round profile pictures in seconds.

Perfect Your Photos with the insMind Image Cropper
Want to get a stunning new look for your photos in seconds? Try insMind Image Cropper – Effortlessly reframe your images for a professional finish.

Effortlessly Brighten Your Images in a Natural Way – insMind Image Brightener
Want to make your dull and dark images attractive and lively? Use the insMind Image Brightener tool online with our guide for the best results.

How to Sharpen an Image With 3 Ways
Are you looking for ways to improve the outlook of your images? We offer the best 3 methods on how to sharpen an image in this article.

Instantly Create Outlines in Images – insMind Image Outline Maker
A powerful tool that quickly adds clean and precise outlines to any image. Learn how to effortlessly enhance your visuals.

Top AI Filters on insMind – Everything You Need to Know
A comprehensive guide to help you quickly master the AI filter function on the insMind platform and find tools that suit your needs.

How to Make a Silhouette: Step-by-Step Guide
Are you looking to add an artistic touch to your pictures? Go through this article to learn how to make a silhouette to achieve this purpose.

How to Curve Text With 6 Ways
The article offers the best 6 techniques on how to curve text in simple steps. Later, learn about the insMind curve text generator and its diverse text options.

How to Add Border to Photo: Tutorial on Photoshop and Easier Way
Want to implement advanced editing features to borders? Below are detailed steps on how to add a border to the photo in Photoshop and insMind.

Free&Easy Tool: Edit Text in Image Online
In this guide, we will teach you how to edit the text in images with insMind and how to make the most out of this tool.

Guide on How to Add Text to Photos Easily Online
Discover the ultimate guide on how to Add Text to Photos Easily Online .Learn easy methods and tools to Add Text to Photos effectively.

How to Make Icon With a Transparent Background
This article explores the top 10 websites that facilitate transparent icons and provides three stepwise guides for removing the background from icons.

How to Change the Background of a Photo on iPhone
In this article, we go through multiple ways explaining how to change background on your iPhone. Also, learn about the top background changer apps in 2024.

How to Change Logo Color in 3 Simple Ways
Are you looking for ways to learn how to easily change logo color? This article provides a guide for designers and marketers looking to customize logos.

Add a Shadow to Product Photos: Photoshop and Easier Method
Elevate your product photography with insMind's AI Shadows—discover a seamless alternative to Photoshop for adding realistic shadows that enhance depth and professionalism in your images.

Enlarge Your Images to 4K with Free AI Image Upscaler
Unlock the full potential of your photos with insMind's AI Image Upscaler. Discover how to effortlessly scale up to 4K resolution without losing detail in this comprehensive guide.

AI Unblur Image: How to Make Blurry Pictures Clear
Discover how insMind's AI-powered tool transforms blurry images into sharp, clear visuals, perfect for enhancing your digital content and preserving memories.

How to Make a Thumbnail for YouTube with AI Design Tool
If you want to go viral on YouTube, read this article explaining how to make a thumbnail for YouTube with a leading AI-powered toolbox called insMind.

How to Easily Make Transparent Background in Paint and Paint 3D
Transform the background of your photos with Paint and Paint 3D. Use insMind and learn how to remove backgrounds by following simple guide and editing options.

How to Restore Old Photos with Photoshop and Easier Way
Revive cherished memories with insMind's AI Image Enhancer, a powerful tool for restoring old photos. Discover an easier, more efficient alternative to Photoshop in this comprehensive guide.

Uncrop Images with Ease Using insMind AI Image Extender
Unleash the full potential of your images with insMind's Uncrop AI. This guide reveals how to effortlessly extend and enhance your photos beyond their original borders.

AI Outpainting: How to Expand Your Images Online for Free
Discover how insMind's AI Outpainting effortlessly extends your images with free, high-quality outpainting. Perfect for filling canvas gaps and enhancing your creative projects.

Effortlessly Convert Photo to Painting: Comprehensive Guide
Learn how to effortlessly converting photos into paintings. Discover the simple steps to transform your images and add an artistic touch to them.

How to Generate LinkedIn Photo with AI
Looking for ways to enhance your LinkedIn profile with zero investment? Read this article to learn how to use insMind to generate high-quality AI LinkedIn photos.

How to Turn a Sketch into a Digital Image with AI
Are you looking for ways to enhance your sketches using AI tools? You can explore this article and understand how to turn a sketch into a digital image.

Effortlessly Cleanup Pictures with AI-Powered Photo Cleaner
Looking to transform your photos effortlessly? Use insMind's AI-powered online photo cleaner to remove unwanted objects and enhance your images for a polished look.

Unlock AI Power: Erase Unwanted Text from Images with Ease
Want to unlock the power of AI to seamlessly erase unwanted text from your images? Dive into our blog for a step-by-step guide and unleash the full potential of your photos.

How to Make a Portrait Photo to Landscape: Top 3 Easy Methods
Discover 3 effective methods to convert portrait photos to landscape orientation. Learn step-by-step techniques to transform your images.

How Can I Change Background Color in Photoshop and Faster Way
This guide offers a vibrant exploration into background color changing, providing readers with the essential tools and techniques to transform any image's background with a palette of stunning colors.

Best Ways to Blow Up Your Images Using the Right Tool
Struggling with finding the perfect tool for upscaling pictures? Read the article to learn the most effective ways to blow up images utilizing the right tool.

Ultimate Guide on How to Change Photo Background to White
This Guide reveals how to effortlessly transform any photo background to pristine white, giving your images a professional and polished look without the need for a studio setting.

The Complete Guide on How to Crop a Person Out of a Photo
This guide illustrates the process of cropping a person out of a photo, ensuring that your final image is polished and distraction-free, allowing the focus to remain on the subject you intend to highlight.

Learning Explicit Ways of Making the Images Bigger
Searching for methods to enlarge images while maintaining their quality? Read this article to learn ways to make pictures bigger using the versatile tool.

How to Remove the Background from Your Signature: 3 Fast Methods
A detailed guide on 3 fast methods that can help you remove background from your signature effortlessly and efficiently.

How to Remove Emojis from Pictures: Top 10 Tools
A detailed guide on 10 tools that can help you remove emojis from pictures effortlessly and efficiently.

3 Proven Ways to Increase Image Size with AI Photo Editor
Learn how to increase image size online or offline using AI, expanding, resizing, and more. insMind is your best bet. Click here to read more.

How to Add Stickers to Photos Easily Online in 2025
A convenient way and detailed steps to add stickers to photos are provided by insMind.

How to Remove Blurriness from Photos with AI
Are you wondering how to fix blurry photos? Learn easy AI steps with insMind to make your images clear.

A Beginner's Guide to Darken Image Online
Are you wondering how to darken an image online? Follow this simple step-by-step guide from insMind to enhance your photos easily.

Why Do I Look So Ugly in Pictures? Reasons and Best Solutions
Are you wondering why you look so ugly in pictures compared to reality? Read this article to learn the reasons and fixes you can apply to reveal your beauty.

Circle Cropper: How to Crop a Picture into a Circle
Crops a picture into a circle efficiently and effortlessly while maintaining high quality.

How to mirror an image horizontally or vertically in Seconds
Learn how to mirror an image horizontally or vertically online in seconds with this quick and easy guide.

2025 Guide: How to Effortlessly Flip and Rotate Photos Online
Learn to effortlessly flip and rotate photos online in 2025 with this easy guide for perfect image adjustments.

Learn How to Turn a Photo into Oil Painting with AI - Simplified Guide
You can stop looking for an effective AI filter tool, as in this article, we will explore an app that accurately turns photos into oil paintings.

Ultimate Guide: How to Turn Photo into Anime with AI Filter
Are you struggling to find a photo converter tool that can turn a photo into anime? Read this article to learn about the best photo anime maker.

Unleashing Creativity: Learn How to Turn Photo into 3D Model
Are you looking to turn a photo into a 3D model to enhance its overall impact? Check out this guide to learn about the best 3D model maker.

Ultimate Guide: How to Change Photo Backgrounds Online
Discover the ultimate guide to changing photo backgrounds online with insMind. Easy steps for perfect results every time.

How to Add a Photo to a Photo: A Step-by-Step Guide
Learn various techniques to add a photo onto another photo using insMind's online tools.

Add Caption to Photo Online for Free: 5 Easy Steps Explained
Discover insMind's easy online tools for adding captions to photos.

How to Turn Photo into Watercolor in 3 Easy Steps Online
Transform your photo into a watercolor online in 3 easy steps. Follow this guide for stunning results effortlessly.

How to Compress Images Online Without Losing Quality
Learn to compress images online without losing quality in this 2024 guide. Quick and easy steps for best results.

How to Add People in Photos: A Complete Guide
Discover methods on how to add people in photos using insMind’s extensive tools. Learn to create realistic composites and enhance your images perfectly.

How to Fix Overexposed Photos with AI Online for Free: Easy Guide
Fix overexposed photos online with free AI. Upload your image, enter a repair prompt, restore washed-out details, and download a balanced photo.

Quick and Easy Way to Add White Border to Photo
Are you looking to add a white border to the photo to make it professionally stand out? Learn from this guide about the best photo editor for this unique purpose.

How to Turn Photo into Sketch Online in 2025
Learn how to turn photos into sketches online in 2025 with insMind's easy-to-follow guide.

How to Effortlessly Convert Images to JPG Online
Learn how to effortlessly convert images to JPG online with insMind's step-by-step guide. Quick and easy solutions for everyone.

How to Use AI to Expand the Background of Your Photo
Learn to use AI online to seamlessly expand the background of your photos with insMind's easy-to-follow guide.

How to Enhance Photo Quality and Resolution with AI(2025 Guide)
Enhance photo quality and resolution online with AI in this 2025 guide. Easy-to-follow steps for best results.
![How to Add Logo to Photos Online for Free [The Simplest Method]](https://static.xsbapp.com/market-operations/market/side/1718795949162.jpg?x-oss-process=image/resize,w_690,h_460,type_6/interlace,1,image/format,webp "How to Add Logo to Photos Online for Free [The Simplest Method]")
How to Add Logo to Photos Online for Free [The Simplest Method]
Discover the best experience to add logos to photos online for free.
![How to Remove Tattoos from Photos [Ultimate Guide 2025]](https://static.xsbapp.com/market-operations/market/side/1718787534476.jpg?x-oss-process=image/resize,w_690,h_460,type_6/interlace,1,image/format,webp "How to Remove Tattoos from Photos [Ultimate Guide 2025]")
How to Remove Tattoos from Photos [Ultimate Guide 2025]
Learn how to remove tattoos from photos online for free using insMind's powerful AI technology. Perfect for professional and personal use.

2 Effortless Ways to Blur Faces in Photos
Do you want to learn how to blur faces in photos to secure your identity? Go through this guide, which provides details about the best photo editor for this purpose.

How to Add Watermark to Photos - The Easiest Guide
Learn how to add watermarks to photos online for free with this easy guide. Put a watermark on a photo and protect your copyright effortlessly!

How to Fix Low Resolution Photos - Explore the Best Method
Are you looking to enhance the quality of your photos? Read this article to learn how to fix the resolution of photos for better-quality output.

The Best and Easiest Way to Add 3D Text To Photo Online - For Free!
Here is the easiest way to add 3D text to a photo online for FREE. Enhance your photos with dynamic 3D text now!

How to Turn Yourself into a PS2 Character with the Best PS2 Filter AI
Do you want to transform your pictures into a PS2 character effortlessly? Learn from this guide all about the best PS2 filter AI, along with its benefits.

How to Crop Images Online with AI: A Complete Guide
Learn to crop images online with AI in this complete, easy-to-follow guide.

How to Enhance Image Quality Online with AI
Discover how to enhance image quality online with AI in this easy-to-follow guide.

How to Uncrop a Photo with AI in 3 Steps
In this article, you will learn the easiest way to uncrop a photo someone sent you with an AI-powered free tool.

How to Remove Glare from Photo Online with AI
Discover how to remove glare from photos online using AI for pristine, glare-free images.

How to Remove Shadow from Photo online with AI
Learn how to remove shadows from photos online using insMind's AI technology for clear, improved images.

AI Photo Restoration Made Easy: A Comprehensive Tutorial
Are you wondering how to restore old photos using AI? Read on to find out the best AI photo restoration tool in 2024.

A Step-by-Step Guide on How to Remove Text from Photos with Ease
Are you looking to learn how to remove text from photos without using complex tools? Here is a detailed step by step guide that will help you.

How to Improve your Social Media Photos, A Complete Guide
Enhance your social media presence with our comprehensive guide to perfecting your photos for maximum engagement and impact.

How to Quickly Remove Photo Watermarks?
Are you looking to learn how to remove watermarks from photos effortlessly? Here is a detailed guide with step by step instructions that will help you.

2025 Guide to Removing People From Photos with AI
Discover insMind's Magic Eraser to remove people from photos efficiently, enhancing image clarity with advanced AI technology.

Quick & Free: Remove Your Logo Background in 3 Easy Steps
Easily make your logo stand out by removing its background for free in just three simple steps.

Easy Guide to Stunning Beauty Photos with AI Background Generator
This guide introduces how to generate stunning beauty photos with insMind AI Background Generator, unlock more details now !

3 Simple Steps to Remove Backgrounds for Perfect Product Photos
This guide tells how to remove backgrounds for your product photos with insMind.